The HTML5 <canvas> element is powerful, but its native API is verbose and low-level. Fabric.js is a JavaScript library that wraps the Canvas API and gives you a clean, object-oriented way to draw shapes, add text, load images, and handle user interaction — all with far less code. This tutorial walks you through the fundamentals: setting up a canvas, drawing rectangles, circles, triangles, and text, and combining them into a simple project. Every code example is complete and runnable — copy it into an HTML file and open it in your browser to see it work.
What is Fabric.js?
Fabric.js is an open-source JavaScript library that makes working with HTML5 Canvas dramatically easier. Instead of calling low-level drawing commands like fillRect() and arc() imperatively, you create shape objects (rectangles, circles, lines, polygons, text, images) and add them to a canvas. Each object is a first-class JavaScript object with properties you can set, get, and change at any time.
The key advantage is interactivity out of the box. When you add a shape to a Fabric.js Canvas, users can click on it, drag it around, resize it with corner handles, and rotate it — all without writing a single line of event-handling code. Switch to fabric.StaticCanvas() if you want a canvas where objects cannot be moved.
Fabric.js also provides serialization (save the canvas state as JSON and restore it later), image loading with filters, SVG export, and a group system for combining multiple objects. It is widely used in web-based design tools, image editors, diagram builders, and educational projects.
<!DOCTYPE html>
<class="hl-attr">class="hl-keyword">html class="hl-attr">lang=class="hl-string">"en">
<class="hl-attr">class="hl-keyword">head>
  <class="hl-attr">class="hl-keyword">title>What is Fabric.js</class="hl-attr">class="hl-keyword">title>
  <class="hl-attr">class="hl-keyword">meta class="hl-attr">charset=class="hl-string">"utf-8" />
  <class="hl-attr">class="hl-keyword">meta class="hl-attr">name=class="hl-string">"viewport" class="hl-attr">content=class="hl-string">"class="hl-attr">width=device-width, class="hl-attr">initial-scale=1.0">
  <class="hl-attr">class="hl-keyword">script class="hl-attr">src=class="hl-string">"https://cdn.jsdelivr.net/npm/fabric@7.2.0/dist/index.min.js"></class="hl-attr">class="hl-keyword">script>
</class="hl-attr">class="hl-keyword">head>
<class="hl-attr">class="hl-keyword">body>
  <class="hl-attr">class="hl-keyword">canvas class="hl-attr">id=class="hl-string">"demoCanvas" class="hl-attr">width=class="hl-string">"400" class="hl-attr">height=class="hl-string">"200"
    class="hl-attr">style=class="hl-string">"border: 1px solid #ccc;"></class="hl-attr">class="hl-keyword">canvas>

  <class="hl-attr">class="hl-keyword">script>
    let canvas = new fabric.Canvas('demoCanvas');

    let rect = new fabric.Rect({
      left: 50, top: 50,
      width: 120, height: 80,
      fill: '#3b82f6',
      rx: 10, ry: 10,
      originX: 'left', originY: 'top'
    });

    let circle = new fabric.Circle({
      radius: 40,
      fill: '#f59e0b',
      left: 220, top: 60,
      originX: 'left', originY: 'top'
    });

    canvas.add(rect, circle);
  </class="hl-attr">class="hl-keyword">script>
</class="hl-attr">class="hl-keyword">body>
</class="hl-attr">class="hl-keyword">html>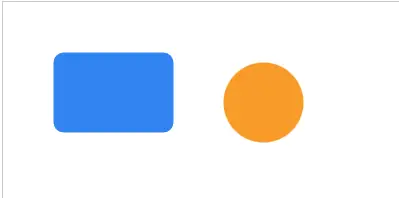
Run this example and you will see a blue rounded rectangle and an amber circle. Try clicking and dragging them — Fabric.js handles all the mouse events automatically. Note that in Fabric.js v7, the default originX and originY are 'center', so we explicitly set originX: 'left' and originY: 'top' to position objects by their top-left corner. Review: Fabric.js gives you shape objects instead of imperative draw calls, built-in interactivity, and serialization. Use fabric.Canvas for interactive canvases and fabric.StaticCanvas for read-only ones.
Setting up your first canvas
Every Fabric.js project starts with two things: an HTML <canvas> element and a Fabric.js Canvas object tied to it. The <canvas> element defines the drawing area in your page. The Fabric.Canvas object is the JavaScript wrapper that lets you manipulate it.
Load Fabric.js from a CDN (Content Delivery Network) so you do not need to install anything. The URL below loads version 7.2.0 from jsDelivr. You can also download the file and host it yourself.
<!DOCTYPE html>
<class="hl-attr">class="hl-keyword">html class="hl-attr">lang=class="hl-string">"en">
<class="hl-attr">class="hl-keyword">head>
  <class="hl-attr">class="hl-keyword">title>My First Fabric Canvas</class="hl-attr">class="hl-keyword">title>
  <class="hl-attr">class="hl-keyword">meta class="hl-attr">charset=class="hl-string">"utf-8" />
  <class="hl-attr">class="hl-keyword">meta class="hl-attr">name=class="hl-string">"viewport" class="hl-attr">content=class="hl-string">"class="hl-attr">width=device-width, class="hl-attr">initial-scale=1.0">
  <class="hl-attr">class="hl-keyword">script
    class="hl-attr">src=class="hl-string">"https://cdn.jsdelivr.net/npm/fabric@7.2.0/dist/index.min.js">
  </class="hl-attr">class="hl-keyword">script>
</class="hl-attr">class="hl-keyword">head>
<class="hl-attr">class="hl-keyword">body>
  <class="hl-attr">class="hl-keyword">canvas class="hl-attr">id=class="hl-string">"myCanvas" class="hl-attr">width=class="hl-string">"500" class="hl-attr">height=class="hl-string">"300"
    class="hl-attr">style=class="hl-string">"border: 2px solid #333;"></class="hl-attr">class="hl-keyword">canvas>

  <class="hl-attr">class="hl-keyword">script>
    // Create the Fabric.js Canvas object:
    let canvas = new fabric.Canvas('myCanvas');

    // Add a simple rectangle to prove it works:
    let rect = new fabric.Rect({
      left: 100, top: 80,
      width: 150, height: 100,
      fill: '#dbeafe',
      stroke: '#3b82f6',
      strokeWidth: 2,
      originX: 'left', originY: 'top'
    });
    canvas.add(rect);
  </class="hl-attr">class="hl-keyword">script>
</class="hl-attr">class="hl-keyword">body>
</class="hl-attr">class="hl-keyword">html>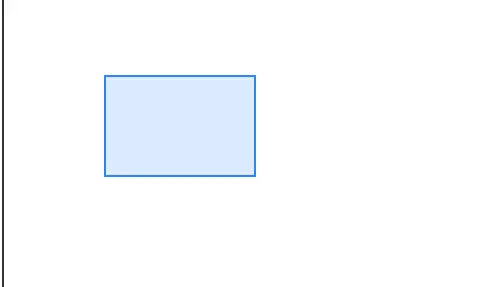
The canvas id in the HTML (myCanvas) must match the string you pass to fabric.Canvas(). If they do not match, you will get a JavaScript error. The width and height attributes on the <canvas> element set the internal resolution of the drawing surface. The CSS width and height (if any) scale the canvas visually but do not change its internal resolution.
Key points: include the Fabric.js script before your own code, create a fabric.Canvas object with the canvas element's id, and call canvas.add() to put shapes on the canvas. Without add(), shapes exist in memory but do not appear.
Drawing rectangles and circles
Rectangles and circles are the building blocks of most canvas designs. In Fabric.js, you create them as objects with property objects, then add them to the canvas.
A rectangle needs left, top, width, and height. You can also set fill (interior color), stroke (outline color), strokeWidth, and corner rounding with rx and ry. In Fabric.js v7, always set originX: 'left' and originY: 'top' if you want to position objects by their top-left corner — this was the default in v5 but changed to 'center' in v7.
// Create a Fabric.js Canvas object
let canvas = new fabric.Canvas('myCanvas');

// A blue rectangle with rounded corners
let blueRect = new fabric.Rect({
  left: 30,
  top: 30,
  width: 160,
  height: 100,
  fill: '#3b82f6',
  rx: 12,
  ry: 12,
  originX: 'left',
  originY: 'top'
});

// A red outlined rectangle
let redRect = new fabric.Rect({
  left: 220,
  top: 30,
  width: 120,
  height: 100,
  fill: 'transparent',
  stroke: '#ef4444',
  strokeWidth: 3,
  originX: 'left',
  originY: 'top'
});

// A green filled rectangle
let greenRect = new fabric.Rect({
  left: 30,
  top: 160,
  width: 200,
  height: 80,
  fill: '#22c55e',
  originX: 'left',
  originY: 'top'
});

canvas.add(blueRect, redRect, greenRect);
A circle uses radius instead of width and height. In Fabric.js v7, the default origin is 'center', so left and top position the circle by its center. Add originX: 'left' and originY: 'top' to position it by its top-left bounding box corner instead.
// A magenta circle positioned by center
let circle = new fabric.Circle({
  radius: 50,
  fill: '#d946ef',
  left: 350,
  top: 80,
  originX: 'center',
  originY: 'center'
});

// A yellow circle positioned by top-left corner
let circle2 = new fabric.Circle({
  radius: 35,
  fill: '#eab308',
  left: 350,
  top: 160,
  originX: 'left',
  originY: 'top'
});

canvas.add(circle, circle2);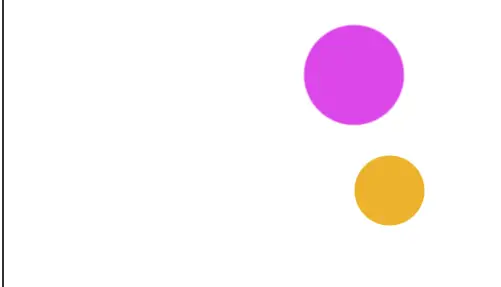
Review: rectangles use width and height; circles use radius. In v7, the default origin is 'center', so use originX: 'left' and originY: 'top' to position by top-left corner, or originX: 'center' and originY: 'center' to position by center. Always call canvas.add() or the shape will not appear. If a shape does not render, check that you supplied width/height for Rect or radius for Circle.
Drawing triangles and polygons
Fabric.js includes fabric.Triangle for isosceles triangles. Like rectangles, they are defined by width and height. The triangle points upward by default. For more complex shapes, use fabric.Polygon with an array of x/y points.
// Three triangles to form a pine tree
let branches1 = new fabric.Triangle({
  width: 80, height: 80,
  fill: '#166534',
  left: 100, top: 20,
  originX: 'left', originY: 'top'
});

let branches2 = new fabric.Triangle({
  width: 100, height: 60,
  fill: '#15803d',
  left: 90, top: 70,
  originX: 'left', originY: 'top'
});

let branches3 = new fabric.Triangle({
  width: 110, height: 50,
  fill: '#22c55e',
  left: 85, top: 110,
  originX: 'left', originY: 'top'
});

// A brown rectangular stump
let stump = new fabric.Rect({
  width: 20, height: 30,
  fill: '#92400e',
  left: 130, top: 150,
  originX: 'left', originY: 'top'
});

// Add in reverse order so branches1 is on top
canvas.add(stump, branches3, branches2, branches1);
Notice the order of canvas.add() calls. Objects added last appear on top. We want the smallest, darkest triangle on top, so we add it last.
For shapes that are not triangles or rectangles, use fabric.Polygon with an array of point objects. Each point has an x and y coordinate. The polygon closes the shape automatically by connecting the last point back to the first.
// A five-pointed star using fabric.Polygon
let star = new fabric.Polygon([
  { x: 100, y: 0 },
  { x: 123, y: 70 },
  { x: 200, y: 80 },
  { x: 140, y: 125 },
  { x: 160, y: 200 },
  { x: 100, y: 155 },
  { x: 40, y: 200 },
  { x: 60, y: 125 },
  { x: 0, y: 80 },
  { x: 77, y: 70 }
], {
  fill: '#facc15',
  left: 250, top: 30,
  originX: 'left', originY: 'top'
});

canvas.add(star);
Review: fabric.Triangle creates isosceles triangles with width and height. fabric.Polygon accepts an array of {x, y} points for arbitrary shapes. The drawing order depends on the order you call add(), not the order you create the objects.
Adding text to the canvas
Fabric.js provides fabric.Text for single-line text and fabric.IText for editable, interactive text. Both support standard font properties like fontFamily, fontSize, fontWeight, fill, and textAlign.
// Static text
let title = new fabric.Text('Fabric.js Tutorial', {
  left: 50,
  top: 30,
  fontFamily: 'Arial',
  fontSize: 28,
  fontWeight: 'bold',
  fill: '#1e293b',
  originX: 'left', originY: 'top'
});

// Subtitle with different styling
let subtitle = new fabric.Text('Drawing shapes on canvas', {
  left: 50,
  top: 70,
  fontFamily: 'Georgia',
  fontSize: 16,
  fontStyle: 'italic',
  fill: '#64748b',
  originX: 'left', originY: 'top'
});

// Editable text(click to edit)
let editable = new fabric.IText('Click me to edit', {
  left: 50,
  top: 120,
  fontFamily: 'Courier New',
  fontSize: 20,
  fill: '#3b82f6',
  originX: 'left', originY: 'top'
});

canvas.add(title, subtitle, editable);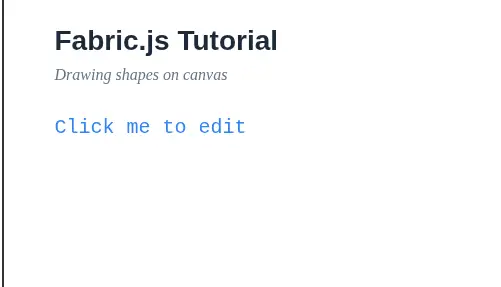
fabric.IText objects can be double-clicked to enter edit mode. Users can then type new text directly on the canvas. Press Escape or click outside the text to exit edit mode. This is useful for labels, captions, and any text the user needs to customize.
Text supports all the same positioning and transformation properties as shapes: left, top, angle (rotation in degrees), scaleX, scaleY, and originX/originY. You can also set padding to add space around the text for easier selection.
Review: fabric.Text creates static text; fabric.IText creates editable text. Set font properties through the options object. IText enters edit mode on double-click.
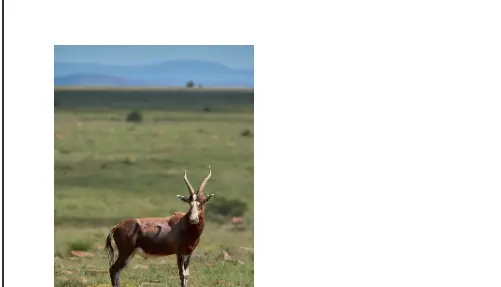
Working with images
Loading images onto a Fabric.js canvas uses fabric.FabricImage.fromURL() in v7. This function returns a Promise and accepts an options object as the second parameter (use { crossOrigin: 'anonymous' } for external URLs). You can then set its position, scale, and add it to the canvas.
// Load an image from a URL(v7 uses FabricImage)
fabric.FabricImage.fromURL(
  'https://picsum.photos/seed/fabric/300/200',
  { crossOrigin: 'anonymous' }
)
.then(function(img) {
  // Scale the image to fit within 200px width
  img.scaleToWidth(200);

  // Position it on the canvas
  img.set({
    left: 50,
    top: 50,
    angle: 0,
    originX: 'left',
    originY: 'top'
  });

  canvas.add(img);
  canvas.renderAll();
})
.catch(function(error) {
  console.error('Failed to load image:', error);
});
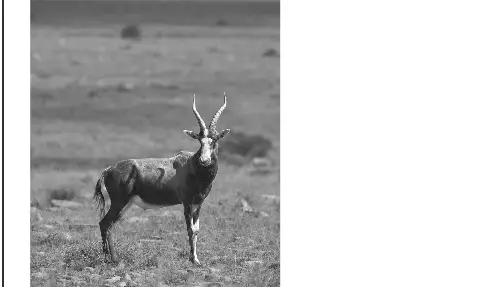
If you need to load multiple images and ensure they all finish loading before proceeding, use Promise.all() with multiple fabric.FabricImage.fromURL() calls. Fabric.js v7 also supports applying filters to images via fabric.filters (Grayscale, Brightness, Contrast, Blur, etc.).
// Load an image and apply a grayscale filter(v7 uses FabricImage)
fabric.FabricImage.fromURL(
  'https://picsum.photos/seed/photo/300/200',
  { crossOrigin: 'anonymous' }
)
.then(function(img) {
  img.scaleToWidth(250);
  img.set({ left: 50, top: 50, originX: 'left', originY: 'top' });

  // Apply grayscale filter
  img.filters.push(new fabric.filters.Grayscale());

  // Apply brightness filter
  img.filters.push(
    new fabric.filters.Brightness({ brightness: 0.1 })
  );

  // Apply all filters and render
  img.applyFilters();

  canvas.add(img);
  canvas.renderAll();
})
.catch(function(error) {
  console.error('Failed to load image:', error);
});
Review: use fabric.FabricImage.fromURL() to load images asynchronously in v7. Pass { crossOrigin: 'anonymous' } for external URLs. Scale images with scaleToWidth() or scaleToHeight(). Apply filters via fabric.filters and call canvas.renderAll() after adding asynchronous elements.
Moving, scaling, and rotating objects
Every object on a Fabric.js canvas supports selection and transformation by default. Users can click to select, drag to move, use corner handles to resize, and use the rotation handle at the top to rotate. You can also control these properties programmatically.
let rect = new fabric.Rect({
  left: 100, top: 100,
  width: 120, height: 80,
  fill: '#8b5cf6',
  originX: 'left', originY: 'top'
});

canvas.add(rect);

// Move the rectangle after 1 second
setTimeout(function() {
  rect.set({ left: 250, top: 150 });
  canvas.renderAll(); // Re-render the canvas
}, 1000);

// Rotate it after 2 seconds
setTimeout(function() {
  rect.rotate(45);
  canvas.renderAll();
}, 2000);

// Scale it after 3 seconds
setTimeout(function() {
  rect.scaleX = 1.5;
  rect.scaleY = 1.5;
  canvas.renderAll();
}, 3000);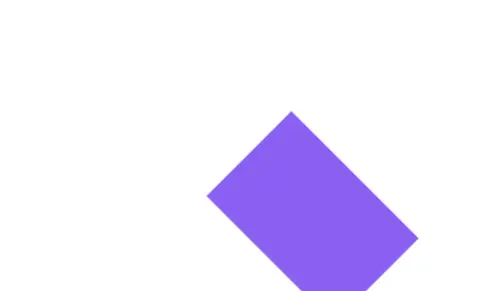
After changing any property programmatically, you must call canvas.renderAll() to update the display. The canvas does not automatically re-render when you change object properties outside of user interaction.
To disable user interaction on specific objects, set selectable: false or evented: false. To disable all interaction on the canvas, use fabric.StaticCanvas instead of fabric.Canvas.
// A non-selectable background rectangle
let bg = new fabric.Rect({
  width: 500, height: 300,
  fill: '#f1f5f9',
  selectable: false,
  evented: false,
  originX: 'left', originY: 'top'
});

// A selectable, interactive shape
let box = new fabric.Rect({
  width: 100, height: 100,
  fill: '#3b82f6',
  left: 200, top: 100,
  originX: 'left', originY: 'top'
});

canvas.add(bg, box);
Review: objects are interactive by default. Use set() to change properties programmatically, then call canvas.renderAll(). Set selectable: false or evented: false to prevent user interaction on specific objects.
Project: Build a simple greeting card
Let's combine everything we have learned to build a simple greeting card. The card will have a colored background, decorative shapes, a title, a subtitle, and a small image. This project demonstrates how shapes, text, and images work together on a single canvas.
<!DOCTYPE html>
<class="hl-attr">class="hl-keyword">html class="hl-attr">lang=class="hl-string">"en">
<class="hl-attr">class="hl-keyword">head>
  <class="hl-attr">class="hl-keyword">title>Fabric.js Greeting Card</class="hl-attr">class="hl-keyword">title>
  <class="hl-attr">class="hl-keyword">meta class="hl-attr">charset=class="hl-string">"utf-8" />
  <class="hl-attr">class="hl-keyword">meta class="hl-attr">name=class="hl-string">"viewport" class="hl-attr">content=class="hl-string">"class="hl-attr">width=device-width, class="hl-attr">initial-scale=1.0">
  <class="hl-attr">class="hl-keyword">script
    class="hl-attr">src=class="hl-string">"https://cdn.jsdelivr.net/npm/fabric@7.2.0/dist/index.min.js">
  </class="hl-attr">class="hl-keyword">script>
</class="hl-attr">class="hl-keyword">head>
<class="hl-attr">class="hl-keyword">body>
  <class="hl-attr">class="hl-keyword">canvas class="hl-attr">id=class="hl-string">"cardCanvas" class="hl-attr">width=class="hl-string">"500" class="hl-attr">height=class="hl-string">"350"
    class="hl-attr">style=class="hl-string">"border: 2px solid #ccc;"></class="hl-attr">class="hl-keyword">canvas>

  <class="hl-attr">class="hl-keyword">script>
    let canvas = new fabric.Canvas('cardCanvas');

    // 1. Background
    let bg = new fabric.Rect({
      width: 500, height: 350,
      fill: '#fef3c7',
      selectable: false,
      originX: 'left', originY: 'top'
    });

    // 2. Decorative circles
    let c1 = new fabric.Circle({
      radius: 60, fill: '#fcd34d',
      left: -20, top: -20,
      opacity: 0.6,
      originX: 'left', originY: 'top'
    });
    let c2 = new fabric.Circle({
      radius: 40, fill: '#f59e0b',
      left: 400, top: 260,
      opacity: 0.5,
      originX: 'left', originY: 'top'
    });
    let c3 = new fabric.Circle({
      radius: 25, fill: '#d97706',
      left: 420, top: 20,
      opacity: 0.4,
      originX: 'left', originY: 'top'
    });

    // 3. Title text
    let title = new fabric.Text('Happy Birthday!', {
      left: 250, top: 100,
      originX: 'center',
      originY: 'top',
      fontFamily: 'Georgia',
      fontSize: 36,
      fontWeight: 'bold',
      fill: '#92400e'
    });

    // 4. Subtitle
    let subtitle = new fabric.Text(
      'Wishing you a wonderful day', {
      left: 250, top: 155,
      originX: 'center',
      originY: 'top',
      fontFamily: 'Arial',
      fontSize: 16,
      fill: '#b45309'
    });

    // 5. Decorative line
    let line = new fabric.Line(
      [150, 190, 350, 190], {
        stroke: '#d97706',
        strokeWidth: 2,
        originX: 'left', originY: 'top'
      }
    );

    // 6. Small star
    let star = new fabric.Triangle({
      width: 30, height: 30,
      fill: '#f59e0b',
      left: 235, top: 210,
      angle: 180,
      originX: 'left', originY: 'top'
    });

    // 7. Bottom text
    let bottom = new fabric.Text(
      'From: EditPhotosForFree', {
      left: 250, top: 300,
      originX: 'center',
      originY: 'top',
      fontFamily: 'Arial',
      fontSize: 12,
      fill: '#92400e'
    });

    canvas.add(bg, c1, c2, c3, title, subtitle, line, star, bottom);
  </class="hl-attr">class="hl-keyword">script>
</class="hl-attr">class="hl-keyword">body>
</class="hl-attr">class="hl-keyword">html>
This card uses a warm amber background, three decorative circles at different corners, a centered title and subtitle, a horizontal divider line, an inverted triangle as a star shape, and a small attribution at the bottom. Every element is a Fabric.js object, so users can click and drag any part of the card to rearrange it.
To make the card non-interactive (for export or printing), replace fabric.Canvas with fabric.StaticCanvas. To export the card as an image, call canvas.toDataURL() which returns a base64-encoded PNG string that you can download or send to a server.
Conclusion
Fabric.js turns the low-level Canvas API into an object-oriented drawing system. You create shapes, text, and images as JavaScript objects, position them with left and top, style them with fill and stroke, and add them to the canvas with canvas.add(). Interactivity — selection, dragging, resizing, rotation — comes free. For more advanced topics like groups, animation, SVG import, serialization, and custom controls, the Fabric.js documentation at fabricjs.com is excellent. The patterns you learned here — create object, configure properties, add to canvas, call renderAll() — apply to every Fabric.js project regardless of complexity.